It’s Getting Hot in Here… So Make Your Own Cold Brew
As the weather heats up, many coffee drinkers are making the switch from a warm and cozy cup o’ joe to an icy, refreshing pick me up. And if you’re anything like me, any time is cold brew time.
Coffee shops have picked up on this and often charge more for cold brew than regular drip coffee. The good news is, you can learn to make cold brew at home! Avoid the crowds and keep those precious dollars in your pocket.
But how?
Maybe you’ve tried making cold brew and it just turned out more bitter than… [insert joke about your ex]. Oof! Why doesn’t it taste like your favorite coffee shop’s version?

3 Top Mistakes
#1: Filling your coffee pot with ice and making hot coffee like normal.
As the hot coffee meets the pot, the ice melts, leaving you with watery, flavorless coffee that’s low in caffeine. Yuck!
#2: Putting your hot brewed coffee in the fridge.
You’re thinking, “I’ll just add some ice and call it cold brew. Right?” Wrong.
While this is a method some people still use to make iced coffee, it’s very different from cold brew.
#3: Losing your freshly brewed cup for 45 minutes and then drinking it at room temp.
Guilty! I know it may seem impossible to forget about that mug of liquid gold you just made, but life can be hectic. It happens to the best of us.
Don’t be embarrassed if you’ve had to trash that failed attempt before anyone noticed. We’ve all been there. There’s a lot of confusion about cold brew and iced coffee.
What’s the difference?
Cold brew can be enjoyed over ice, but not all iced coffee is cold brew. Iced coffee is typically made by letting hot brewed coffee cool and then serving it over ice. Cold brew is made by steeping coarsely ground coffee in cold (or room temperature) water for several hours.
Why does my hot coffee taste bad when it gets cold?
Time for a mini science lesson.
It’s all about the extraction process. To put it simply, different water temperatures pull out different things from the coffee grounds.
When making regular coffee, you use hot water, ideally between 195 and 205 degrees Fahrenheit. Hot water extracts oils and acids that low temp water leaves behind in the beans. Don’t get me wrong, those extra oils and acids are essential to the perfect hot cup of coffee or espresso. But once that brew cools down, your taste buds detect more bitter and acidic flavors. That’s why you get that harsh, unpleasant, pour down the drain taste when your hot coffee gets cold.
We all know good things come to those who wait. Cold brew is no exception. The perfect cold brew needs to steep for about 12 hours to reach its flavor peak.
But it can be a bit tricky, and messy, without the right gear.
Hands down, the best cold brew I’ve ever made at home was with the Brewista Cold Pro 4 Cold Brew System. I adore this coffee maker! I start the process on Sunday and by Monday morning I have 3.5 gallons of cold brew. That’s a week’s worth of delicious cold brew ready to go. It’s like a meal prep, but for caffeine, much more important!
Road map to making your best cold brew
1. Measure the coffee
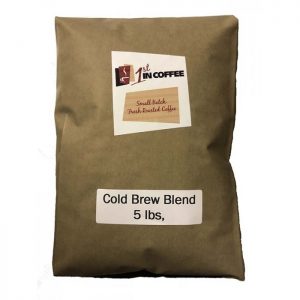
For ready to drink cold brew, use 1 lb. of your favorite roast for every 2 gallons of water. Or try my favorite beans roasted specifically for cold brew. Feel free to customize the ratio to match your taste preferences.
2. Grind away
Set your grinder to the coarse setting and pour in the beans. Skip this step when using pre-ground coffee beans.
3. Don’t forget the filter
Place the disposable PLA filter (included with the system) into the permanent filter.
4. Add the coffee
Pour the freshly ground coffee into the PLA filter. Place the filter combo with coffee into the bucket.
5. Add water
Slowly pour room temperature water in a circular motion over the grounds to fully drench the grounds.
6. Let it bubble
Allow the coffee to sit for 5 minutes while the coffee gases bubble up. In the coffee world, this is called letting it bloom.
7. Stir it up
Using a long spoon, gently stir the grounds, making sure they are completely saturated. Put the lid on the bucket and let it brew untouched for about 12 hours. The longer the coffee brews, the stronger the resulting flavor will be. But don’t leave it for too long, over extracting the coffee grounds will pull out those acids and oils we want to leave behind.
8. It’s ready!
I’m salivating. Ok,keep it together. Lift up the permanent filter and twist until it rests on the inside of the bucket to let the grounds drain. Once drained, remove the filter and toss it in the trash. Or check out this post for some creative ideas on what to do with the used grounds.
9. Transfer
Pour the cold brew into a large glass pitcher or individual mason jars for easy grab and go.
10. Enjoy!
You did it! Give yourself a pat on the back and savor that cold brew. Drink it neat or over ice; black or with cream and sugar. The possibilities are endless!
Of course, you will want to keep it in the fridge to preserve freshness. After waiting 12 hours for the perfect cup of cold brew, you will likely drink it all within a few days. But for optimal flavor, enjoy within 7 days. You will undoubtedly be so delighted with the quality of your cold brew that at the end of the week, your pitcher will be empty and you’ll already be making more. But just in case you happen to have a little left over, click here for some creative tips.


No Comment