How Does a Compressor Ice Cream Maker Work? Step-by-Step Guide
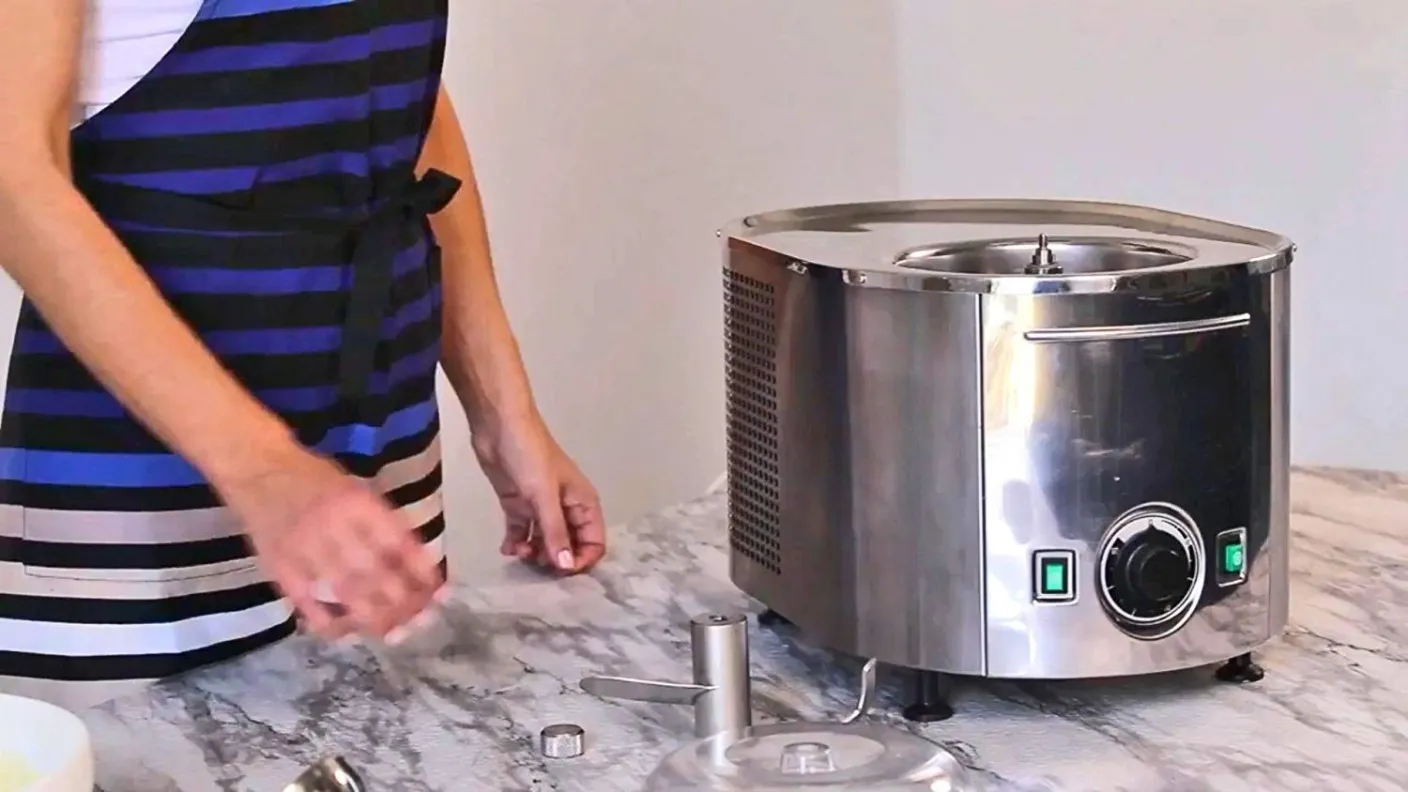
A compressor ice cream maker uses a built-in refrigeration unit to freeze a liquid base while continuously churning it, combining cold temperature, constant movement, and controlled air to turn cream, sugar, and milk into a smooth, scoopable dessert. Get that process right, and texture takes care of itself.
Let’s see how the whole thing works, from the compressor’s cooling cycle to the churn, and what actually separates a silky result from an icy one.
A compressor ice cream maker uses a built-in refrigeration unit to freeze a liquid base while continuously churning it, combining cold temperature, constant movement, and controlled air to turn cream, sugar, and milk into a smooth, scoopable dessert. Get that process right, and texture takes care of itself.
Let’s see how the whole thing works, from the compressor’s cooling cycle to the churn, and what actually separates a silky result from an icy one.
What a Compressor Ice Cream Maker Does
Here’s what’s actually happening inside the bowl.
- Freezing the Base: Unlike machines that rely on a pre-frozen bowl, a compressor machine uses its own refrigeration unit to pull heat out of the mix continuously, for as long as churning runs. That means the bowl stays cold on demand, and the mixture’s temperature drops evenly while it’s kept in motion.
- Churning the Mixture: Churning isn’t just stirring. As the base begins to freeze, water molecules in the cream and milk start to form crystals. Continuous movement breaks those crystals apart before they can grow. This is critical because keeping the mixture moving prevents large ice crystals from forming, and large crystals are what cause that rough, grainy texture.
- Adding Air: As the mixture freezes, the paddle folds air into the base. That air lightens the finished ice cream, giving it a soft, scoopable consistency. Without it, the final product would freeze into something closer to a candy-hard block than a creamy dessert.
How a Compressor Ice Cream Maker Works Step by Step
Every stage in this process affects what ends up in the bowl. Here’s the full sequence from start to scoop.
- Pre-Cool the Machine: Compressor machines don’t need a bowl frozen in advance, but running the compressor for a few minutes before adding the base helps the bowl reach a lower starting temperature and speeds up the freeze once churning begins.
- Add the Ice Cream Base: Your base should be cold before it hits the bowl. A warm base slows freezing and increases the risk of early ice crystal formation, even when the compressor is running. Refrigerate your base for several hours before churning, or cool it quickly over an ice bath.
- Start the Churning: With the compressor running and the bowl cold, pour in your base and let it run. Don’t stop and restart mid-churn. Any pause gives crystals time to set, which directly affects the smoothness of the result.
- Freeze While Mixing: The base thickens gradually. You’ll see it pulling away from the bowl walls and building body. This stage usually takes 20 to 40 minutes, often faster than freezer-bowl machines, thanks to the compressor’s steady, aggressive cooling. You’re aiming for soft-serve consistency at this point, not fully hardened ice cream.
- Harden After Churning: The machine dispenses soft serve. For a properly scoopable final product, transfer the churned mixture to an airtight container and freeze it for two to four more hours. That hardening stage finishes the freeze without additional churning.
- Start Another Batch: Because the compressor chills independently, there’s no need to wait for a bowl to refreeze. Once the current batch is out, the machine can go straight into the next one.
Why Churning Creates Smooth Ice Cream
Here’s how each piece of that process contributes to the texture you’re after.
Smaller Ice Crystals: Water in the mix will always form ice crystals as it freezes. What you can control is their size. Constant movement, combined with the steady cold from the compressor, breaks up crystal formation before they grow. The result is thousands of tiny crystals, imperceptible on the tongue, rather than fewer large ice crystals that produce a rough, icy bite.
Better Fat Distribution: The fat in the cream and milk needs to stay evenly distributed throughout the mixture as it freezes. Churning prevents those fat molecules from clumping. Even distribution is part of what makes ice cream feel rich and full-bodied rather than thin.
Controlled Air Incorporation: Not all air is equal. Gradual, steady overrun from consistent churning creates a uniform bubble structure that lightens the texture without making it hollow or insubstantial. This is the balance that defines a genuinely creamy result.
Home vs. Commercial Compressor Machines
Both home and commercial compressor machines use the same core principle: an independent refrigeration unit chills the bowl while the paddle churns. The differences come down to scale and precision.
Here’s where those differences show up most clearly.
Batch Size: Home compressor machines typically produce 1-2 quarts per batch. The Musso Lussino (1.5 qt) and Musso Pola (2 qt) are excellent examples of this category. Commercial units handle much larger volumes in continuous cycles.
Cooling Power: Commercial refrigeration chills faster and more aggressively than home compressor units. Faster freezing leads to smaller crystals forming before they have time to grow, which is part of why commercially made ice cream often has a noticeably smoother texture.
Texture Control: Commercial equipment offers precise temperature control at every stage, producing consistent results across thousands of batches. Home compressor machines perform well, but ambient kitchen temperature and base temperature still introduce some natural variation.
Factors That Affect Ice Cream Texture
Even with a compressor handling the cooling, results can vary. Texture is sensitive to factors that operate independently of the machine itself.
Here’s what has the biggest influence on the final product.
- Base Temperature: The colder the base temperature, the better. A warmer starting temperature slows the freeze and increases the risk of early crystal formation during churn. Refrigerate the base for at least a few hours before adding it to the machine.
- Sugar and Fat: Sugar lowers the freezing point of the mix, producing softer ice cream that’s easier to scoop. Fat from the cream slows crystal growth by coating the crystals. Getting the balance right in your recipe matters as much as the machine.
- Churn Time: Under-churning results in a too-liquid mixture. Over-churning over-agitates the fat in the cream and can produce a greasy texture. The mix pulling away from the bowl walls and holding its shape is the cue to stop.
- Storage Method: For long-term storage, temperature fluctuations in a standard freezer can cause partial melting and refreezing, leading to larger crystals in the finished ice cream. Press plastic wrap directly against the surface of the ice cream in its container to slow that process.
Common Mistakes to Avoid
Most texture problems trace back to one of a few avoidable errors. Here’s what to watch for at each stage.
- Warm Base: Pouring a room-temperature base into the machine overwhelms even a compressor’s cooling and produces larger crystals from the start. Always chill the ice cream base before churning.
- Overfilled Bowl: The mix expands as air folds in. Too much volume leaves no room for that expansion. Stay below the machine’s maximum fill line.
- Skipping the Pre-Cool: Adding the base to a bowl that hasn’t cooled for a few minutes slows the initial freeze and can leave the finished texture slightly softer than it should be.
- Skipping Hardening Time: Pulling ice cream straight from the machine results in soft-serve consistency. The churned mixture needs two to four hours in the freezer to reach a fully scoopable texture.
Features to Look for When Choosing a Compressor Ice Cream Maker
Understanding how the machine works makes it easier to evaluate what actually matters. 1st in Coffee applies the same thinking to its espresso machine lineup: prioritize the core mechanism over surface-level features. The same holds for any compressor ice cream maker.
Here are the specs that actually affect results.
- Compressor Strength: A stronger compressor cools faster and more evenly, shortening churn time and helping produce smaller ice crystals. It’s the single most impactful spec for comparing models.
- Bowl Capacity: Match capacity to how much you actually make. A 1.5-quart bowl suits most households. The Musso Lussino is a good benchmark for this size. Go larger, like the 2-quart Pola, only if you regularly need bigger batches.
- Timer Controls: A built-in timer or automatic shutoff reduces the margin for over-churning and makes the process less hands-on.
- Easy Cleaning: Removable, dishwasher-safe components make the difference between a machine you use regularly and one that sits on a shelf. Check that the bowl and paddle detach cleanly before buying.
Frequently Asked Questions
How long does it take a compressor ice cream maker to make ice cream?
Most home compressor machines take 20 to 40 minutes to churn a batch to soft-serve consistency. Add two to four hours of hardening time in the freezer for a fully scoopable final product.
Do I need to pre-freeze anything before using a compressor machine?
No. Compressor machines have a built-in refrigeration unit and don't require a pre-frozen bowl. A few minutes of pre-cooling before adding the base is enough to get started.
Why is my homemade ice cream icy?
An icy texture almost always indicates the presence of large ice crystals in the mix. Common causes include a warm ice cream base, inconsistent churning, or improper long-term storage with repeated temperature fluctuations.
Can a compressor-based ice cream maker make gelato or sorbet?
Yes. The same freeze-and-churn process applies to both. Gelato uses more milk than cream and incorporates less air. Sorbet replaces dairy with fruit purée. Both can be made in a standard compressor machine with the right recipe adjustments.
Key Takeaway
Ice cream texture depends on three things: how cold the machine gets, how consistently it keeps the mixture moving, and how much air it incorporates. A compressor handles the first part automatically; the recipe and technique take care of the rest.
Start with an ice cream base; don’t overfill the bowl, and always allow full hardening time after churning. Those habits, more than any single feature on the spec sheet, are what produce a consistently creamy, smooth ice cream every time, whether you’re churning a small home batch or scaling up to commercial ice cream makers for higher-volume production.
The Author